
Last night I made an experiment in my kitchen – an experiment which had fantastic results. I made a pizza without a trace of flour/starch/gluten! I made a cauliflower pizza.

For those of you who are familiar with the LCHF lifestyle – this will be nothing new for you. However for those of you who aren’t, you may ask yourself ‘what is a cauliflower pizza’?
Well, it is a type of ‘pizza’ where the base is made up entirely out of cauliflower and cheese! And do you know what the best part is? It tastes ‘almost’ exactly like a thin crust pizza but with a fraction of the carbs!
C and I have been eating primarily low carb high fat (LCHF) for the last year and we love it, but it has taken me a while to make this recipe as I have just been incredibly sceptical. Pizza dough out of cauliflower? Really?
However, it is delicious! Even C who was not too thrilled when he heard that I was planning on making cauliflower pizza for dinner last night, changed his tune immediately when he tried it.
It not difficult but it IS fiddly to make – but I promise you, you will enjoy the results.
While I was looking for a good recipe for cauliflower pizza, the best recipe I found was from this blog Eat Fat Lose Fat – the instructions were clear, the pictures helpful and the end result, fantastic. So I highly suggest that you pop on over and check out the rest of the blog and the other great recipes that are on it!
Cauliflower Pizza Base
It will be really useful if you have silicon baking sheets like this. However if not, make sure you use parchment paper that is very well greased
Ingredients
- 1 medium head cauliflower
- 1 cup shredded cheese (We used a combination of gouda and a parmesan type cheese)
- 1 large egg
- ½ tsp salt
- 1 tbsp of oregano (feel free to use any dried herbs of your choice!)
Pre-heat your oven to 220C (425f)
Break up your cauliflower in florets. In batches, pop the cauliflower florets in a food processor and pulse until you have a ‘rice’ type consistency.
Place cauliflower in a microwave safe bowl and pop into the microwave for 8 minutes – until cooked through.
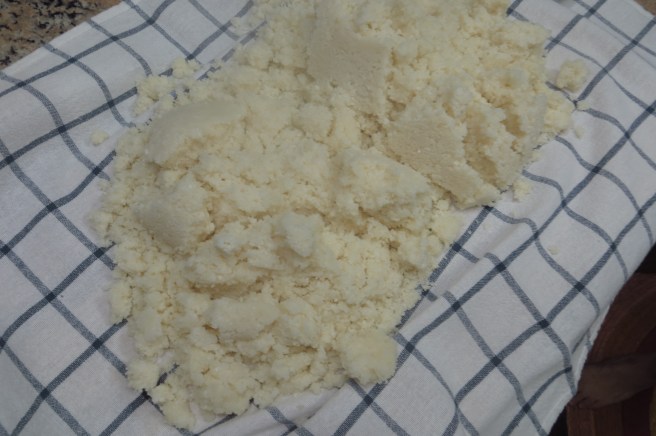
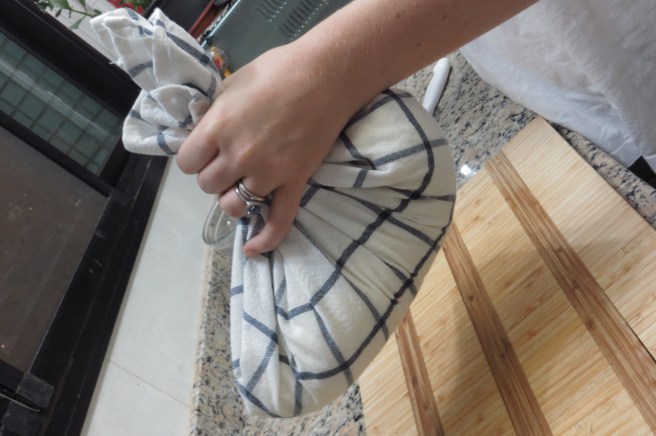
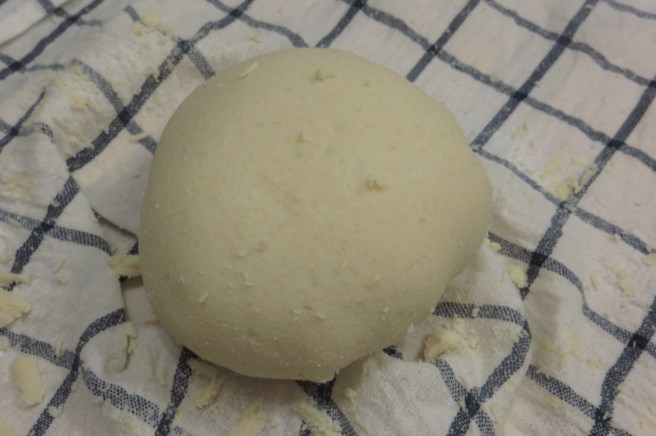
Allow cauliflower to cool down almost completely, and then place it all into a clean kitchen towel. Pick up the corners of the towel and squeeze as much water out of it as you can. You will be surprised at how much water you will manage to squeeze out, but the dryer the cauliflower the better the results.
Place the squeezed cauliflower (which now looks like dough) in a bowl and add the egg, cheese, salt and herbs. Mix thoroughly.
Line your baking sheet with the silicon liner (or greased parchment paper) and place your ‘dough’ on the middle of it. Pat the mixture into a thin layer. We made a rectangle ‘pizza’ but naturally you can make it round! The base should be fairly thin, but with no holes.

Blot the top of the cauliflower base with paper towels, then place in the middle of the oven and bake for 15 minutes.
After 15 minutes, take out the base. Blot the top again with a paper towel. Then flip the base. I did this by placing another silicon liner on top of the pizza base, grabbing both liners and quickly flipping the liners.
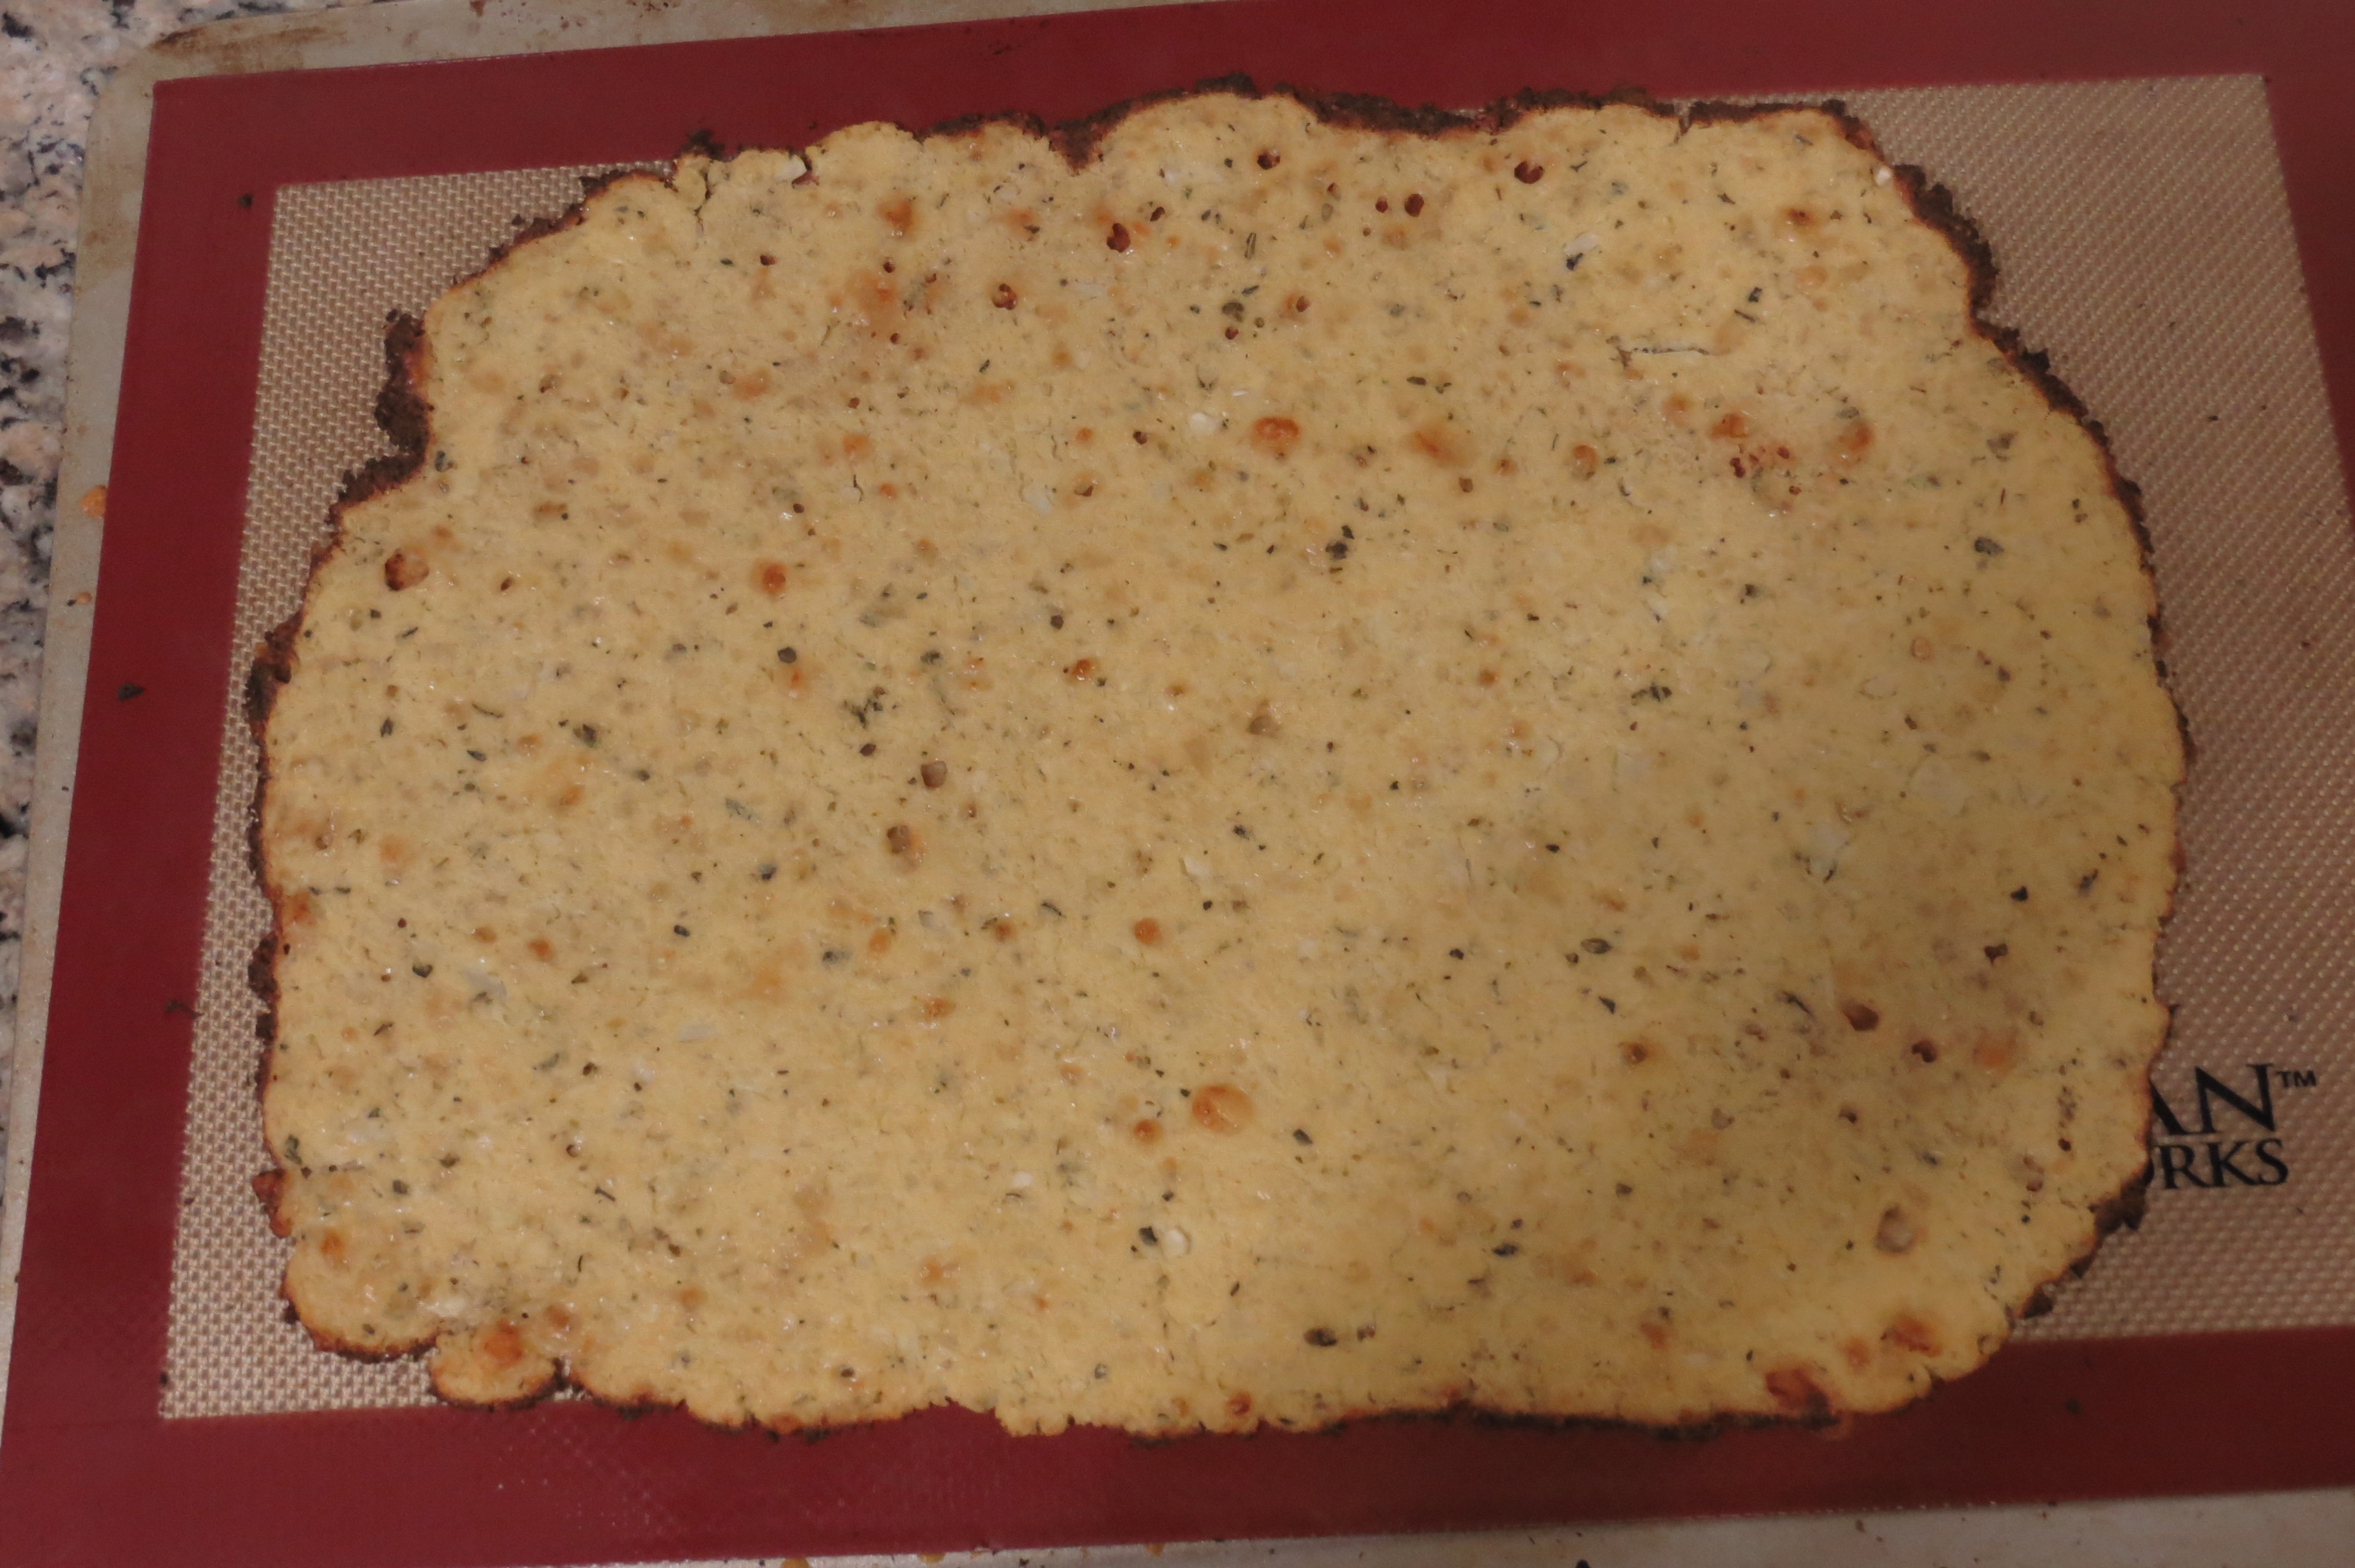
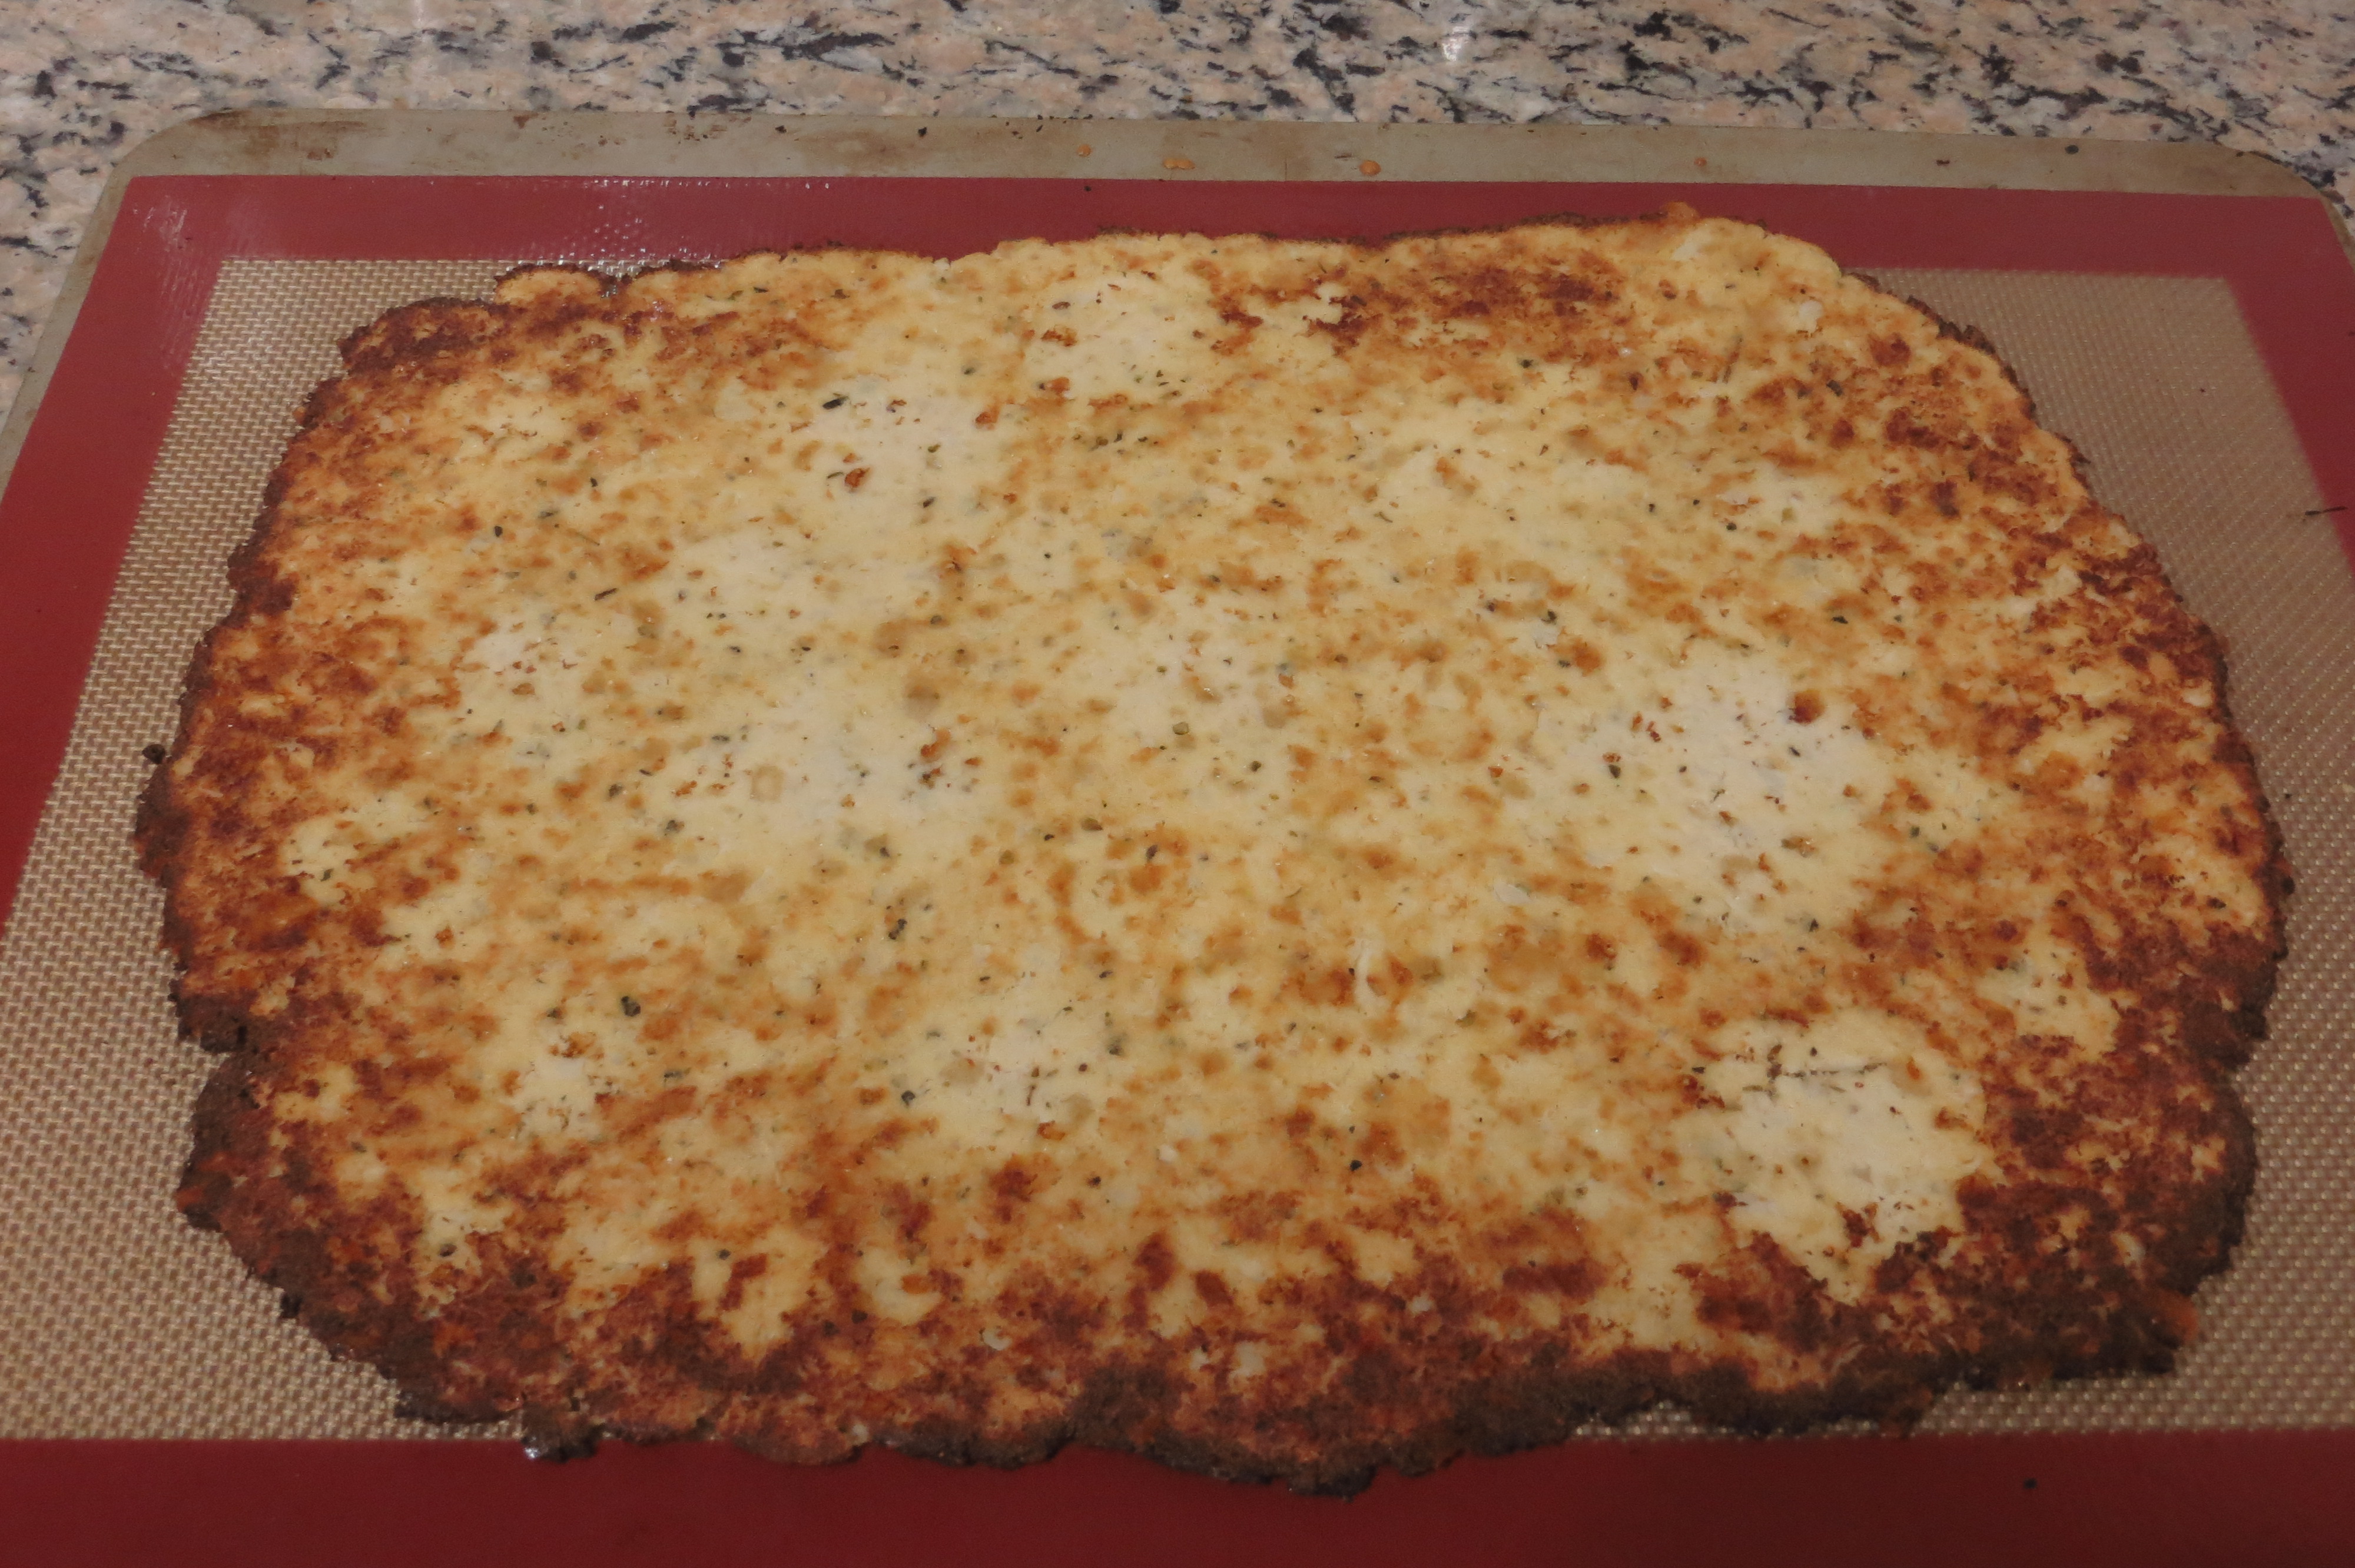
Blot the ‘new’ top – and pop it into the oven for a further 5-10 minutes, or until it gets a nice colour.
Now you have a complete pizza base!
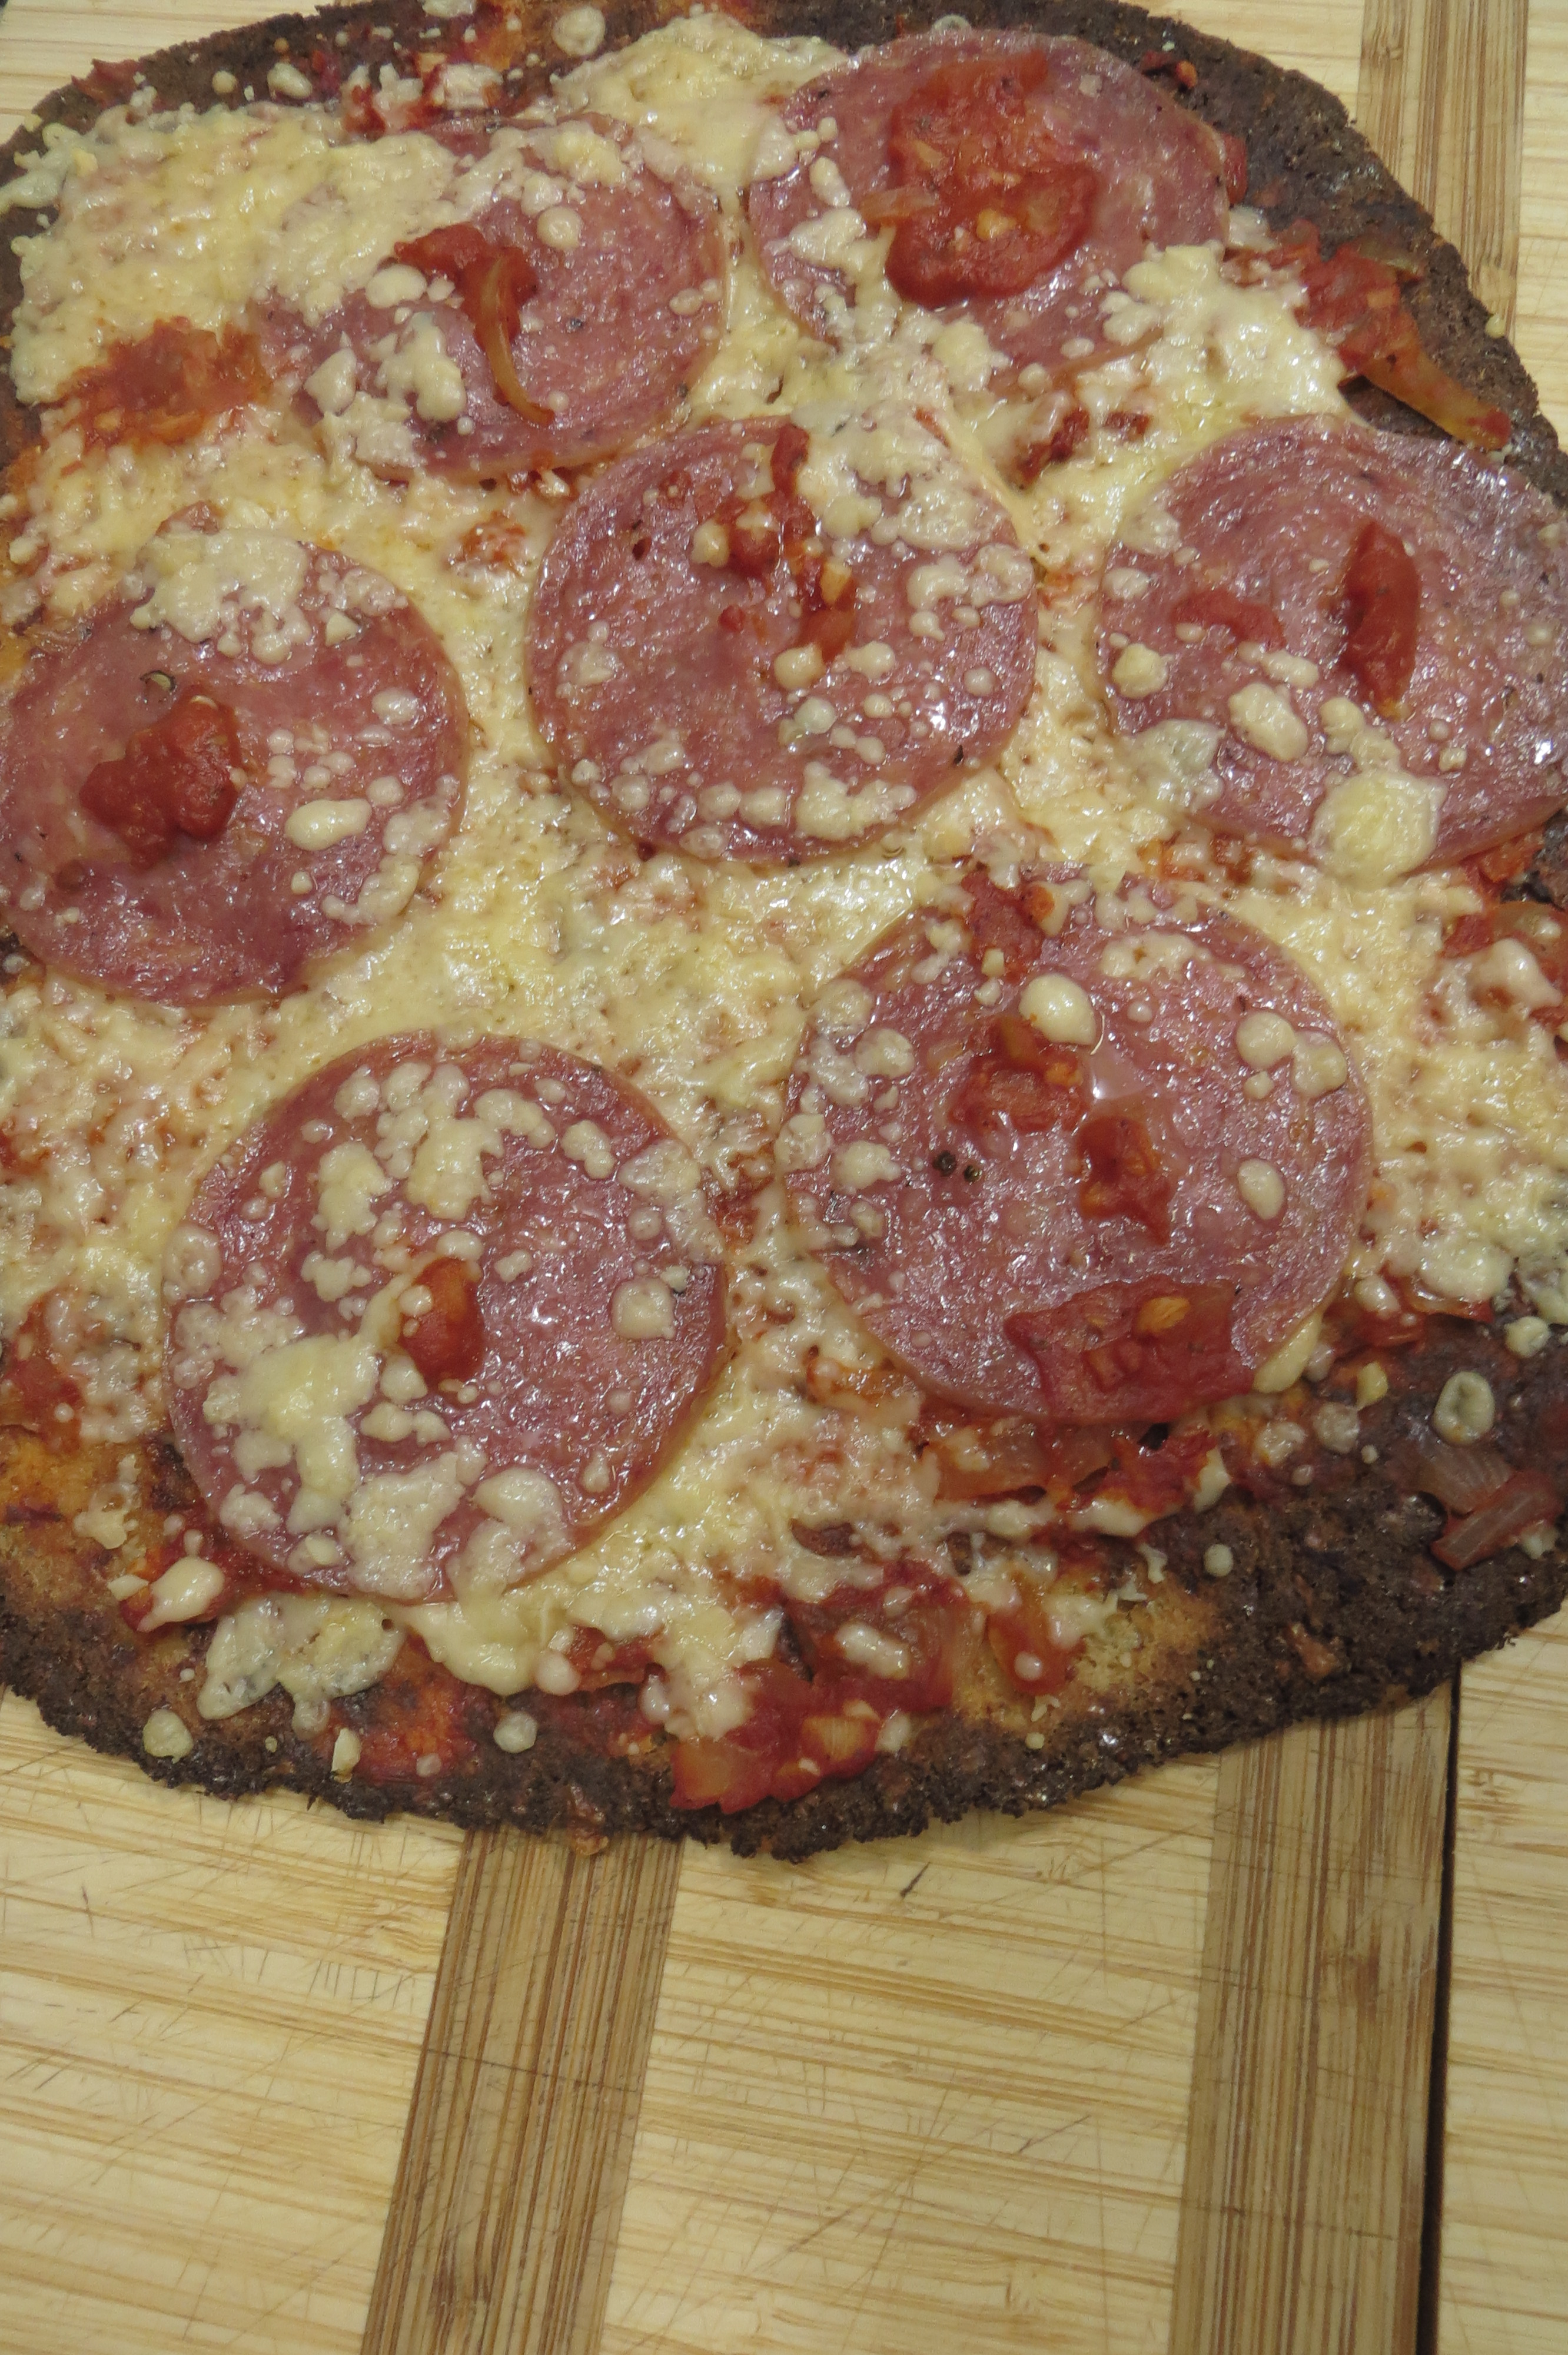
Assemble your pizza as you would normally do – and put in under the broiler for 5 minutes or until the cheese has melted and browned
Slide the pizza onto a rack and let cool for 10 minutes – then slice up your pizza and enjoy!
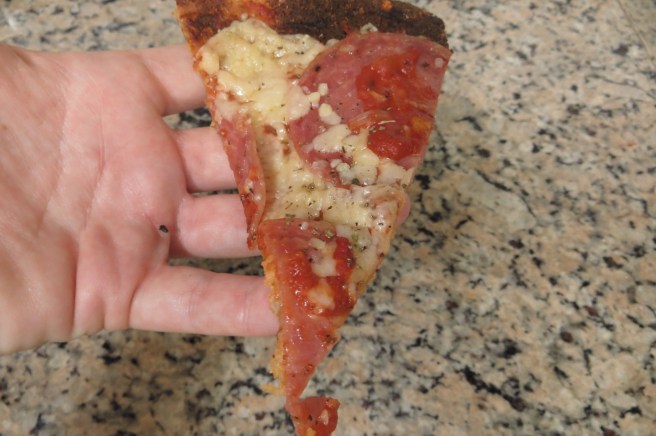
As mentioned, it IS fiddly – but the results are worth it! It really felt as though we were eating a pizza, but due to the high fat content, we were full after only a few slices, and experienced none of the bloating you would with a flour crust pizza.
This cauliflower pizza will definitely be a regular now in our household!

I have always wanted to try this! Might have to give it a go this week :)
Yes, please do! It is a bit fiddly, but the results are fantastic! Let me know how it goes :)
Great pizza
I made this Cauliflower pizza tonight and it was a big success! It was a tad fiddly, but it will be easier next time now I know the steps. I brushed olive oil on top of baking paper (which was on an oven tray) as I didn’t have silicone trays and it came off perfectly. Will definitely make this once a week on our Friday pizza nights. Thanks for the recipe.
Niiiice. I’d drink the cauliflower juice or save it for a broth. Hate waste. =)