
We are almost at the tail end of the Chinese New Year celebrations, where we say goodbye to the the year of the Wooden Goat and welcome in the year of the Fire Monkey! Doesn’t life already sounds so much more exciting ;)
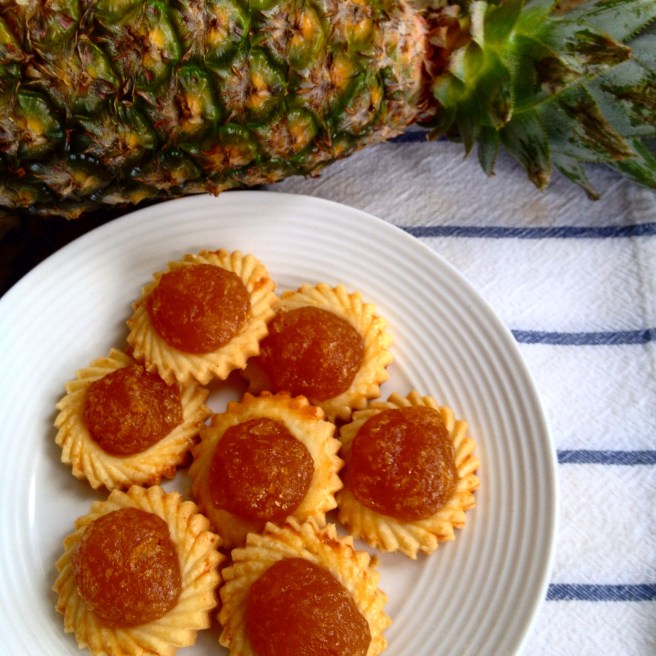
On Saturday night we were invited to a Singaporean friend’s housewarming and Chinese New Year celebration here in Brasilia. It was potluck, and I immediately knew what I wanted to bring. Nothing says ‘Chinese New Year’ more to me than Pineapple tarts, and as this is such a popular biscuit in Singapore, I thought they would also bring a little bit of home comfort during this very important celebration to my new friend.
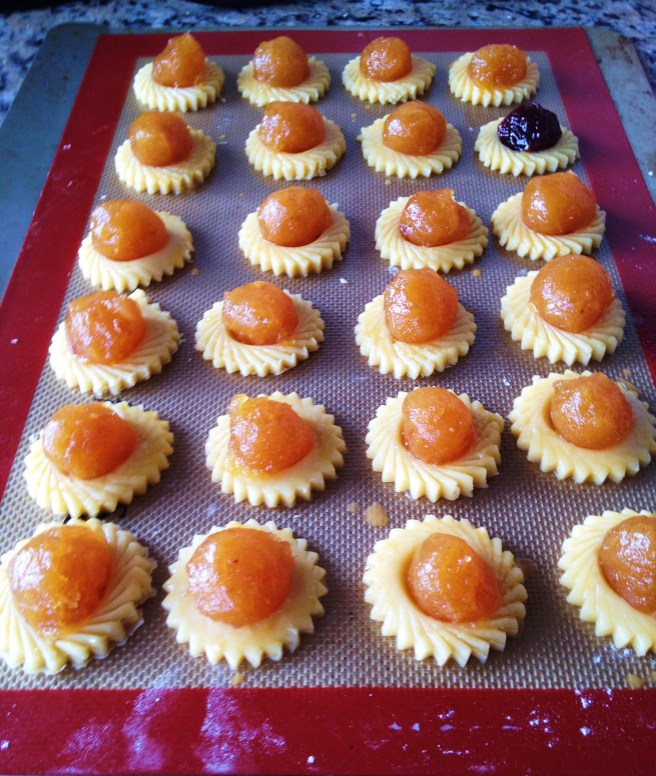
What are pineapple tarts, I hear you say? Well, essentially they are bite-sized pastries that are either filled or topped with pineapple jam. Although available all year round in Singapore and Malaysia, they are especially popular during Chinese New Year due to their auspicious golden colour which signifies wealth and prosperity.
Now let’s get something clear – I have eaten hundreds of pineapple tarts in my day, but I have never made them on my own! In fact, I would be so bold as to guess half of the Chinese population in Singapore has never made pineapple tarts either – as it is something so easy to get a hold of – so I was slightly nervous about embarking on this project. However it turns out they really are quite straightforward.
Although not essential – what you need to make these pineapple tarts look like the ‘real deal’ is a specific cookie cutter which looks like this:
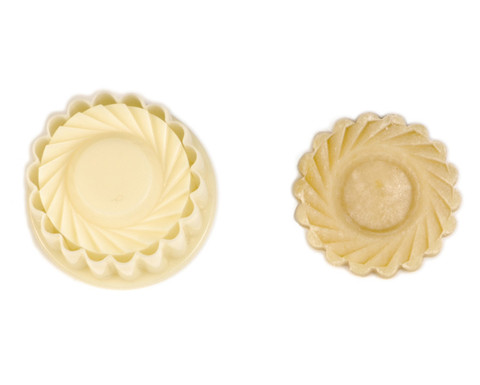
If you are in the U.S. you can buy them online HERE, and if you are in Singapore you can find them in most baking shops, I think I got mine from Phoon Huat in Holland Village for a few dollars. However, apart from aesthetics this specific cookie cutter is not essential – any round or flower shaped cookie cutter would do perfectly as well, so don’t let that put you off!
However before I give you this recipe – I have to admit that I am not 100% happy with it. It is a good basic recipe, however it is FAR too sweet for my liking – despite me cutting down the sugar content in both the filling and pastry significantly. Furthermore, the jam was only enough for half of the pastries (you don’t want to be stingy on the jam…that is the best bit!), so in future I would double the pineapple. Having said that, I did add raspberry jam that I had in the fridge to the remaining pastries – and they turned out wonderfully – so at least I learnt something new :)
Pineapple Tart – makes approx 40 biscuits
Filling
- 1kg pineapple – peeled, cored and cut into large pieces. (I would use 2kg in future)
- 300g sugar (I used 150g)
- 2-3 cloves
- 1-2 cinnamon sticks
- Pinch of salt
Pastry
- 220g unsalted butter
- 80g icing sugar (I used 50g)
- 1 egg
- 350g plain flour
- 1tsp baking powder
Place pineapple into the blender and blend till fine (it will look like juice). Pour the blended pineapple into a wok or wide brimmed sauce pan. Add the remaining ingredients and cook on low heat until it thickens, about 40 minutes. Note: you want the jam to be a very thick consistency so that you are able to roll it into balls.
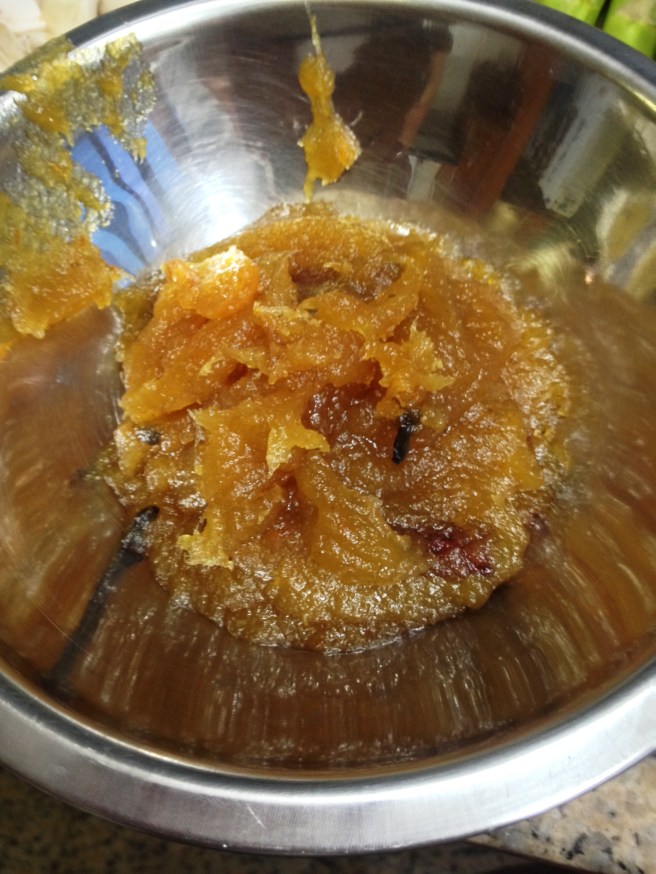
Set aside to cool.
Meanwhile cream the butter and icing sugar together, then add the egg. Continue to cream until smooth. Add the sieved flour and baking soda. With your fingers, lightly blend the ingredients together until they bind and form a dough. Note: You don’t want to knead the ingredients as the cookie will lose its flaky texture.
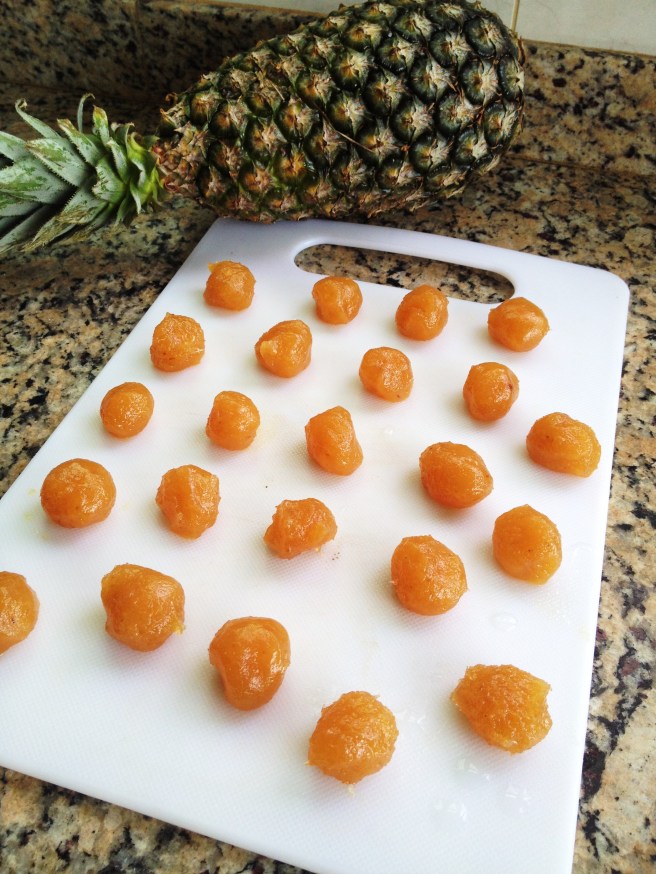
Once the dough has come together, refrigerate for 30 minutes. In the meantime shape the pineapple filling into 1.5cm small balls. TIP: I found that when my hands were cool and wet it was easier to make the balls.
Roll out the pastry between plastic wrap until ½ cm thick. Cut it with cookie cutter and place the pastry on a greased cookie sheet. Then place a small ball of pineapple paste on the centre of the pastry.
Brush with egg wash and bake at 180°C (355°F) for 15 – 20 minutes.
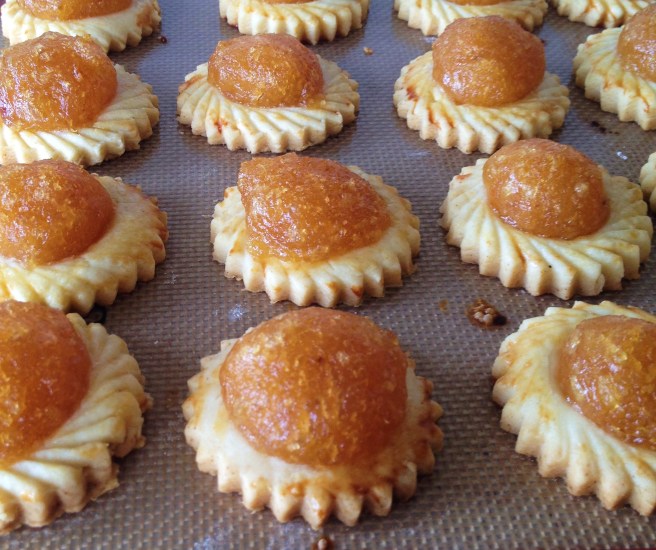
Although the recipe needed a little tweaking here and there, overall I was really happy with the outcome and it showed just how easy these pastries are to make!
After I made the tarts, I stumbled across this super cute youtube video by Nyonya Cooking – and highly recommend watching it so that you can clearly see how the tarts are meant to look like at each stage. I would also be interested in using her recipe for next year’s batch :)

I’m so glad I found this site!!!! I’ll be moving to Brasilia in January and I have a ton of questions about shopping for food! Particularly specialty Asian and Italian food.